
Table of Contents
The clients page allows you to acess the Client Relationship Management module, where you can administer every client's account (client details, offers, documents, history, events, etc).
![[Note]](images/note.png)
|
Access |
|---|---|
|
Clients -> Serch |
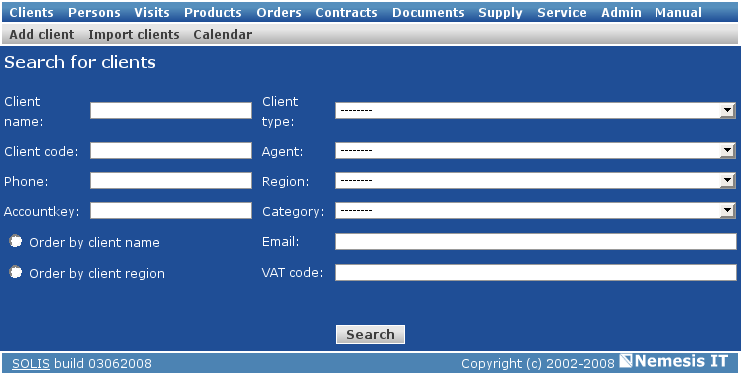
In the "Search for clients" page you can sort the contacts in the database, based on various data filters, as following: client's name, client's code, telephone number, account key, institution type, account manager (sales representative), region, category, email or VAT code.
You can use one or more search criteria simultaneously. Some of the fields require a complete fill in (client code or accountkey), while some allow you to search based on a part of a term (e.g. searching by a part of a client's name: "laboratory")
The dropdown lists can be managed in the Administration module.
Besides the searching criteria, two more options are available for the results display: you can sort out the search result by client's name, alphabetically, or by client's region.
If you use no searching criteria, the system displays a list of maximum 200 entries. To access the entire list of clients, you can use SOLIS Reports.
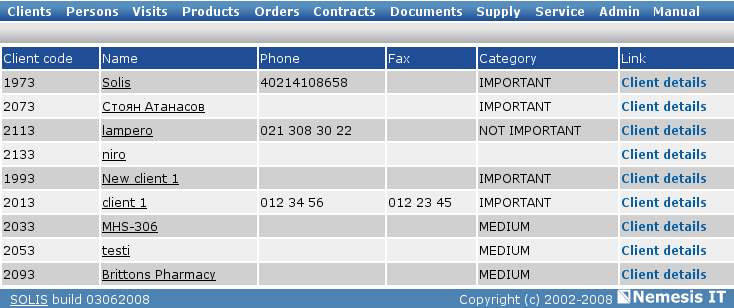
The result of a client search is a list(table) with all the clients who suit the selected criteria. The table displays general information about each client(client's code, telephone number, category, etc).
On the last column, for each entry, you have a direct link to the client's details page, where you can access the client's history (). On the last column of the table, for each client, there is a link to the Complete details page, where you can view the client's history (contact details, visits, documents, orders, contracts, etc.)
Secondary menu:
Add client - to add a new client to the database
Import clients -to import a list of clients to the database
Calendar - to view the comercial events calendar
There are two options for adding new clients to the database. Clients can be added manually, one by one, or they can be automatically imported, from a file with special format, if the clients list is longer.
|
|
Access path |
|---|---|
|
Clients -> Add client or Clients -> Import clients |
Use the "Add client" button form the secondary menu of the "Clien Search" page (upper left) to acess the new client details page.
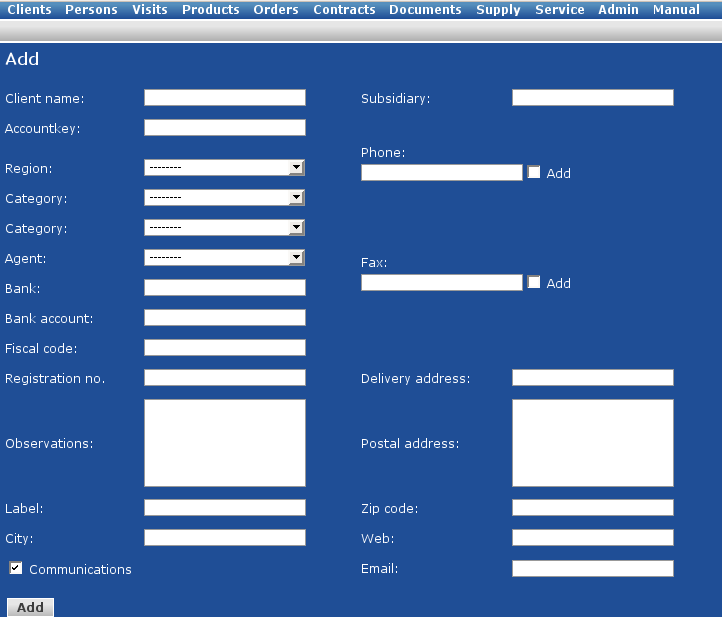
The client's name, region and accound manager(sales representative) are mandatory. Some of the fields ("Region", "Category", "Class" and "Sales Repr.") contain drop-down lists with all the available options. These lists can be defined in the administration section.
When adding a new telephone or fax number, the "Add" checkbox is automatically checked.If you wish to add more than one telephone or fax numbers, after adding the new client to the database, you can edit its details and complete the list. See "Edit".
You can add more email adresses in the "Email" field, separated by commas.
In the lower left of this page you can see the "Communications" checkbox, initially checked. If you wish to send comunications by email to the client, this checkbox must remain checked. Otherwise you can uncheck the checkbox and the client will not receive the messages sent automatically with Solis.
After filling in the details, click the "Add" button (lower left) and you will be redirected to the Complete details page of the new page. You can then add contact persons, visits, documents or edit the information you entered previously.
![[Tip]](images/tip.png)
|
Observation |
|---|---|
|
Before adding a client to the database, you must check if it is already registered, to avoid similar entries (e.g. Nemesis IT, Nemesis IT S.R.L.). You can not add two clients with the same name to the database. |
use the "Import clients" button in the secondary menu of the "Client search" page (upper left).
Solis allows you to automatically import lists of clients or contact persons in the database, from csv files. There are two forms in which this information can be imported, described in the import page. Examples of compatible csv and excel files are available on the same page.
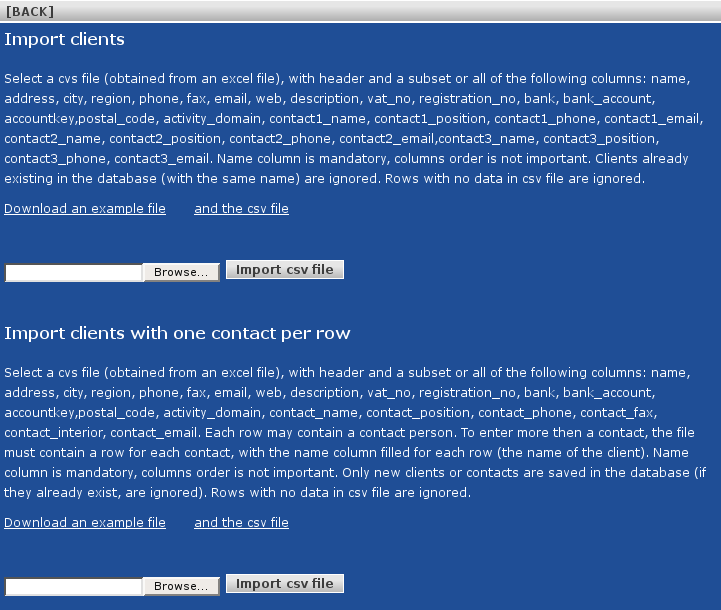
After preparing the list of clients or contact persons, you can load it in the system, using the simple "Browse" option, followed by "Import csv file".
![[Important]](images/important.png)
|
Important |
|---|---|
|
Once you have chosen a certain type of file, you must assure you loaded it in the corresponding area. |
The "Client details" page is the center of all activity with one client and presents details of the client's current state (latest events, offers, orders, contracts, etc) and the client's complete history (all offers, all orders, all contracts, etc).
To view the details page of a client, the simplest way is to search the client in the database. After finding the client, you must click the client's name or the "complete details" link on the right.
|
|
Access |
|---|---|
|
Clients -> Client search -> Client details |
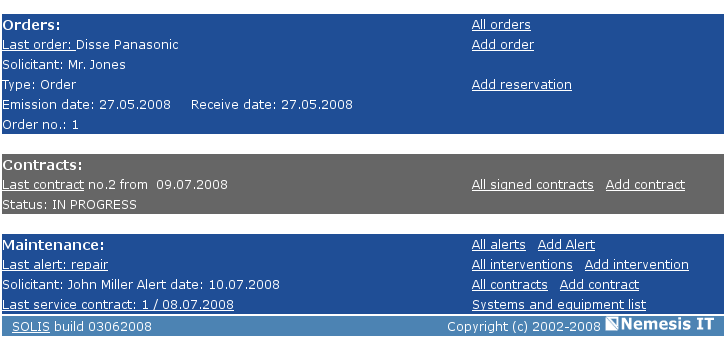
The details page of a client includes five sections: "Client details", "Offers", "Orders", "Contracts" and "Maintenance".
|
|
Observation |
|---|---|
|
For general information about offers, orders, contracts and maintenance, use the specific modules or Solis Reports. |
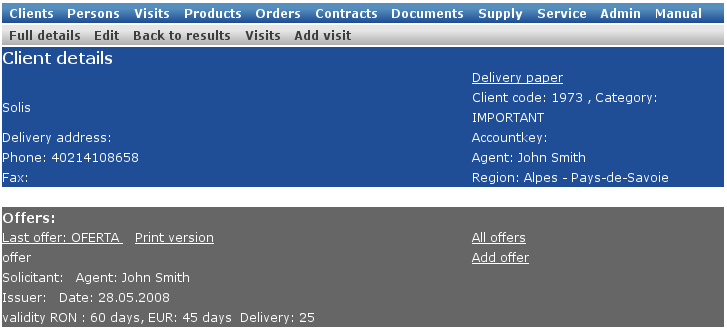
The "Client details" section offers a few contact information: name, adress, telephone number, fax number (on the left side) and some general information: client's code, class, account key, account manager, region (on the roght side).
To acess the complete details of the client (contact information, contact persons, events, etc.) use the Full details button in the secondary menu.
The secondary menu contains the buttons:
Unlike the Client details page, which presents the complete situation of a client, the "Full client details" page allows the management of the client's contact information and the commercial visits.
To consult the complete details of a client, use the "Full details" button, in the secondary menu of the "Client details" page.
|
|
Access |
|---|---|
|
Clients -> Client search -> Client details -> Full details |
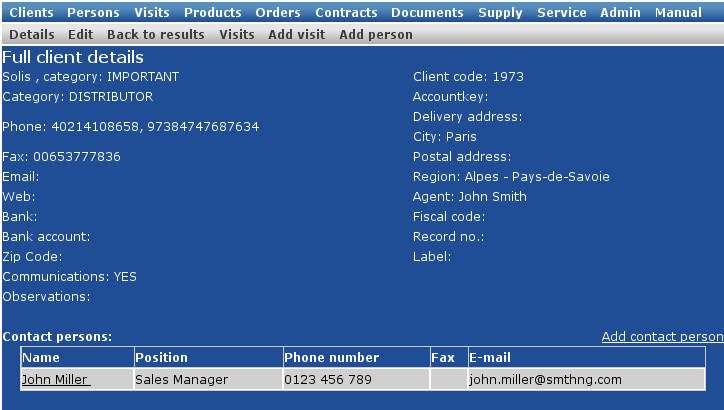
The new page contains all the client details registered in the database:
contact details - postal adress, delivery adress, telephone and fax numbers, email adress, website, fiscal information.
internal information - client code, category, class, account key, accounst manager or sales representative, general observations, etc.
contact persons - with details (name, function, phone, fax, email). To see the complete details of a contact person, click on the person's name, in the list. To add a new contact person, use the "Add contact person" button.
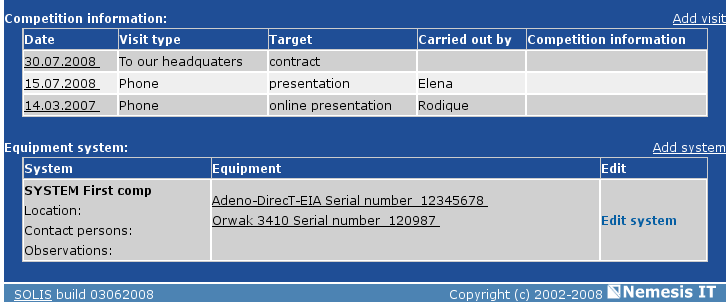
visits (events) - listed chronologically, with general details (date, type of visit, goal, person). To access the complete details of a commercial event, click the date in the visits list.
equipments - the complete list of equipments held by the client (with or without maintenance contract). To access the complete details of an equipment or system of equipments, see the "Service" section.
The complete details page displays the contact persons, events and equipments of a certain client. To have a more general view on these aspects, use the "Persons", "Visits" or "Service" pages.
Secondary menu:
Details - to return to Client details
Edit - to open the client's editing page
Back to results - to return to the list of clients generated by the search
Visits - to consult the list with all the commercial events of the client.
Add visit - to add a new event to the client's history
Add person - to to add a new contact person for the client.
The "Edit client" page allows you to return and modify the information registered in the database.
|
|
Access |
|---|---|
|
Clients -> Search clients -> Client details -> Edit or Clients -> Search clients -> Client details -> Full client details -> Edit |
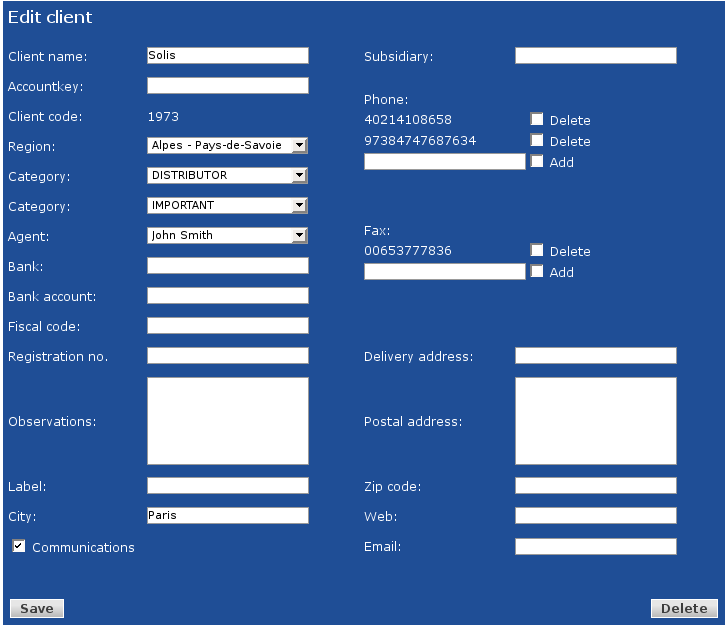
For some of the fields in the client's edit page, you have dropdown lists which include all the available options.
|
|
Observation |
|---|---|
|
The dropdown lists can be managed in the administration section. |
You can add a new phone or fax number in the open space below the corresponding category. When a new phone or fax number is filled in, the "Add" checkbox becomes checked. After saving the changes, the new number will be added to the list. In the same way you can delete a number already registered (check the "Delete" option corresponding to the number and save the changes).
If you wish to send general messages (newsletters, invitations, etc.) to the client on its email adresses, check the "Communication" checkbox.
After you complete the changes, use the "Save" button.
|
|
Observation |
|---|---|
|
The client's code (identification number) can not be modified. The code must be unique to keep the client's history. |
If you wish to delete a client, use the "Delete" button (lower right).
|
|
Important |
|---|---|
|
A client can be deleted only if there are no related information in the database (contact persons, visits, offers, orders, etc.). Before deleting the client, you must delete all the others entries, from the corresponding editing pages. |
|
|
www.nemesisit.ro |
 |

|
 |

|
Chapter 2. Contact persons |