
The Solis users can be managed in the administration section.
![[Note]](images/note.png)
|
Acces |
|---|---|
|
Admin -> Users |
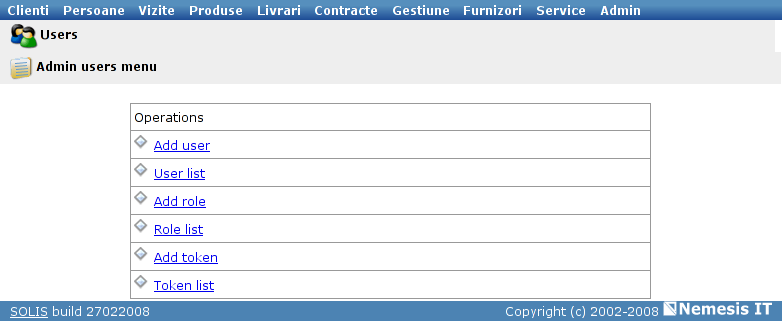
The rights of using the system are defined by lists of tokens, which can be grouped into roles. These roles can be assigned to each user, according to the case. In the "Users" section, you have access to the lists of tokens and roles, to the list of registered users and the possibility of adding entries in these lists.
The list of registered users can be consulted using the "User list" option.
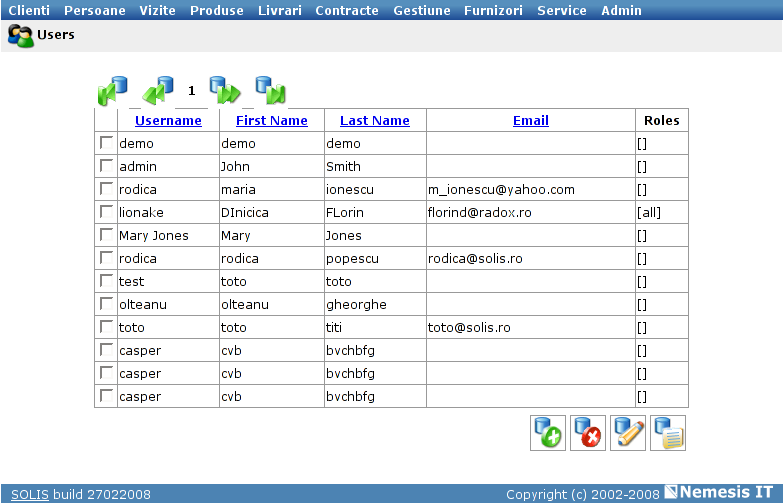
The system displays all the users and some details about them (username, name, email adress, roles).
An user can be edited using the buttons under the list:
to remove an user - mark the checkbox in the front of the name and click the second button
![[Important]](images/important.png)
|
Important |
|---|---|
|
If any type of information in the database is associated to the user (documents, clients), it can not be removed. In this case, the user can be deactivated - uncheck the "Active" box. The user will no longer appear in the dropdown lists. |
to edit an user's rights - select the user and client the third button
to edit an user's contact details - select the user and click the last button.
The first button is used to add a new user to the list.
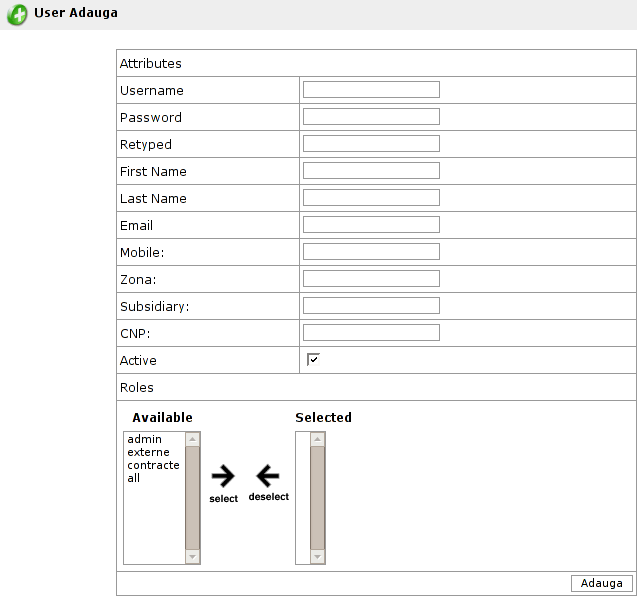
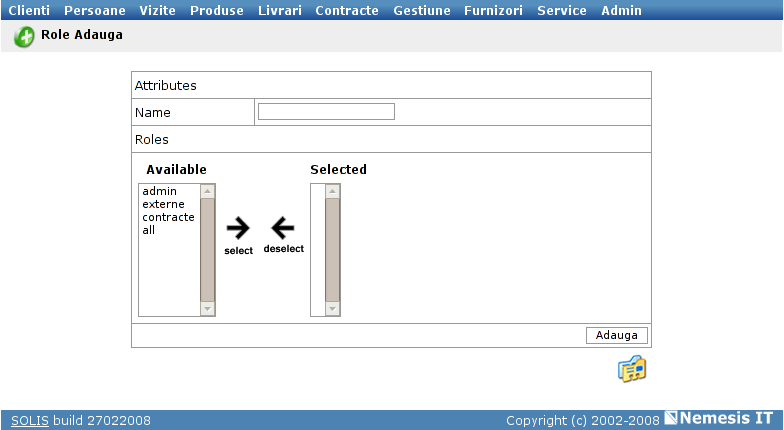
In the new page you van register the details of the new user (username, password, contact details, roles).
The roles are assigned by transferring them one by one from the "Available" to the "Selected" list . After selecting the right roles, click the "Add" button and the user will be active.
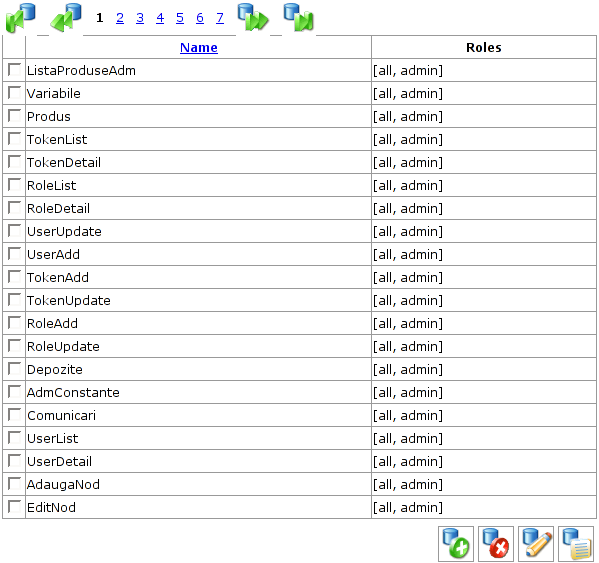
The list of defined roles can be viewed using the "Role list" button.
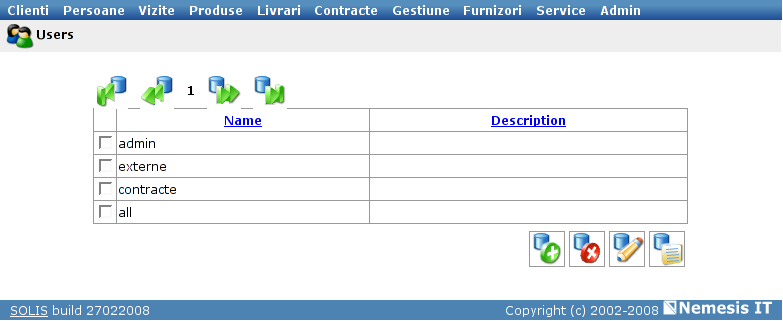
The system displays the complete list of defined roles (name and description). They can be edited using the buttons in the lower section of the page.
to delete a role - select the role and click the second button
to edit a role (number or description) - select the role and click the third button
The first button is used to add a new role to the list.
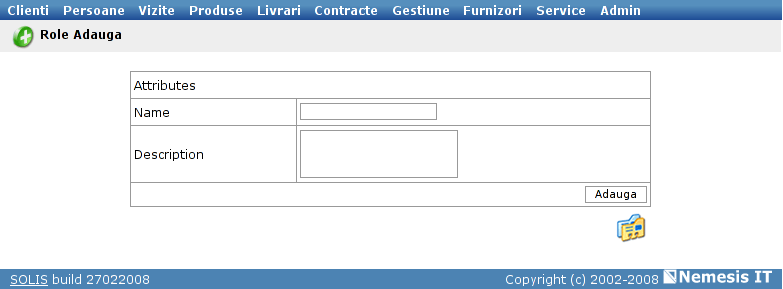
To add a new role, fill the name and description and click the "Add" button. The role will be available to be completed with the list of tokens.
Example 27.1. Example: How to register a region role
An user can have specific action roles (sales representative, external orders, support engineer, etc) and acces roles (a region is a list of districts, defined according to the company's needs).
The first step is to add the new region role, following the above instructions (Muntenia, for example). Once the role is added, it can be defined by assigning tokens.
Besides the system's page titles, the token list also contains the list of districts and/or countries to manage the information on a geographic basis.
For example, the "Muntenia" role will be defined by the following tokens: Bucuresti, Arges, Braila, Buzau, Calarasi, Dambovita, Giurgiu, Ialomita, Ilfov, Prahova, Teleorman.
To assign a token, search it in the token list and edit its properties (third button, lower right) to include the new "Muntenia" role. Select the role from the "Available roles" list and add it to the "Selected roles" list, then save your changes.
After all the district tokens of the region have been edited, the role can be assigned to a user. Select the user in the user list and click the same edit button (third, lower right). Besides the personal details, you can see the list of available and assigend roles. Select the "Muntenia" role and save the changes.
The user will only have access to the clients registered in the "Muntenia" region (in the districts of this region).
|
|
Observation |
|---|---|
|
The user may already have a more general role, like "All regions" or "Romania". |
The list of tokens used to define the system's users roghts can be accessed using the "Token list" button.
A token is a page of the application. By assigning a token to a type of user, the users of that type will be allowed to use the page.
These tokens can be assigned using the buttons in the lower part of the list
To add or remove a token from a role's token list, use the third button. Under the token's name you can see the list of roles to which the token has been assigned and the list of available roles, to which the token has not been assigned.
To consult a token's details, select it and click the last button.
To delete a token, use the second button.
The first button is used to add a new button.
In the new page you can fill the token's name and select the roles to which it will be assigned.
|
|
www.nemesisit.ro |
 |

|
 |
| Chapter 26. Warehouses |

|
Chapter 28. Constants |